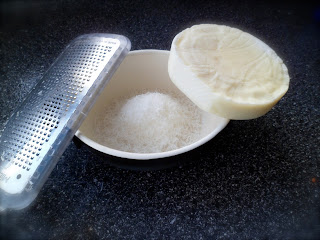
Cotija is a hard cheese traditionally made with cow milk. Although everything is better with goat milk (according to Feta), this recipe for cotija can be made with cow milk.
2 L goat milk
1 T yogurt
1/8 t rennet, in 1 T water
1/2 to 1 T salt (to taste)
1. Heat milk to 86°F, add yogurt, ripen one hour. Add rennet to water, rest while the milk ripens.
After an hour, add rennet to milk, whisk. Rest at about 86°F for 45 minutes, or until a clean break is achieved (some days it may take a little longer than 45 minutes - be patient):
2. Cut curds into quarter-inch squares:
 |
| More-or-less quarter-inch squares (sometimes the curd just won't stay still). |
3. Rest 10 minutes, then stir gently:
 |
| Once you stir, you'll see that some of the curds will be bigger than a quarter inch, so you'll need to cut them down to size. |
4. Slowly heat the curds and whey to 95°F - this should take about 20 minutes:
5. Rest five minutes, then drain the curds. The easiest way to drain the curds is to gently pour off the whey. You may find it is helpful to put the lid on the pot (sterilized, of course) and drain the curds, much like you would drain the water from a pot of boiled vegetables.
6. Hold curds at 95°F for 10 minutes, stirring occasionally:
 |
| A slotted spoon is useful for stirring in the salt, and for moving your curds between containers. |
 |
| Cheese mold full of curds. |
- 2.25 kg for 10 minutes, flip cheese (take the opportunity to reposition your cheese cloth, should you wish), press another 10 minutes with the same weight
- 4.5 kg for 60 minutes
- 7.5 kg for 12 hours
 |
| Pressing is easy with a dutch cheese press, but works just as well with more home-made contraptions like these. |
10. While the cheese is pressing, prepare a brine of 1 1/2 C salt and 1 quart (about 1 liter) water.
11. Remove cheese from press, and soak in cold brine overnight. Age in a cool, dry cupboard for two weeks.
 |
| The finished product. |
Serve grated over slow-cooked pulled pork and black beans, or enchiladas, or in place of parmesan, if you're feeling adventurous.


No comments:
Post a Comment